Sunday, September 11, 2011

Creating a JDesktopPane

Program Description:

One of the interesting and useful part in making Java Program is creating a JDesktopPane which is an MDI (Multiple Document Interface) commonly used in today's applications. It is a main window called parent window that contains other windows called child windows. It is used to manage several open documents that are being processed in parallel. The Java Program below is a short simple code on how to create a JDesktopPane and JInternalFrame.

Output:


Code:

/**
 * File: createJDesktoPane.java
 * Tiltle: Creating a JDesktopPane
 * Author: http://java-program-sample.blogspot.com/
 */

//Java Core Package
import javax.swing.*;
//Java Extension Package
import java.awt.*;
import java.awt.event.*;

public class createJDesktoPane extends JFrame {
 
 //Initializing program components
 private JDesktopPane desktopTest;
 private JLabel labels[];
 private JTextField inputs[];
 private JButton buttons[];
 private String labelName[]={"Enter Name: ","Enter Age: ","Enter Address: ","Enter Mobile#: "};
 private String buttonName[] = {"Open","Save","Exit"};
 private JPanel panel1, panel2;

 //Setting up GUI
    public createJDesktoPane() {
     
     //Setting up the Title of the Window
     super("Creating a JDesktopPane");

     //Set Size of the Window (WIDTH, HEIGHT)
     setSize(600,500);

     //Exit Property of the Window
     setDefaultCloseOperation(JFrame.EXIT_ON_CLOSE);

     JMenuBar bar = new JMenuBar(); //Constructing JMenuBar
     JMenu menu = new JMenu("File"); //Constructing JMenu name "File"
     JMenuItem newFile = new JMenuItem("Add New Data"); //Constructing JMenuItem with "Add New Data" label
     
     menu.add(newFile); //Adding JMenuItem in the JMenu
     bar.add(menu); //Adding JMenu in the JMenuBar
     
  setJMenuBar(bar); //Adding JMenuBar in the container
  
  desktopTest = new JDesktopPane(); //Creating a JDesktopPane
  desktopTest.setBackground(Color.BLACK); //Setting JDesktopPane background color
  
     //Setting up the container ready for the components to be added.
     Container pane = getContentPane();
     setContentPane(pane);
     
     pane.add(desktopTest); //Adding JDesktopPane in the container
     
     //Implemeting Even-Listener on newFile JMenuItem
     newFile.addActionListener(
  new ActionListener() {
   
   //Handle JMenuItem "newFile" event if it is clicked
   public void actionPerformed(ActionEvent e) {
   
   //Constructing an Internal Frame inside JDesktopPane
   JInternalFrame frame = new JInternalFrame(null,true,true,true,true);
   
   Container container = frame.getContentPane(); //Creating a container inside the JInternalFrame
   
   //Constructing JLabel, JButton, and JTextField inside JInternalFrame
   labels = new JLabel[4];
   inputs = new JTextField[4];
   buttons = new JButton[3];
   
   //Creating a JPanel 1 with GridLayout of 4 rows and 2 columns inside JInternalFrame
   panel1 = new JPanel();
   panel1.setLayout(new GridLayout(4,2));
   
   //Constructing JLabel and JTextField using "for loop" and add to JPanel 1
   for(int count=0; count<labels.length && count<inputs.length; count++) {
    labels[count] = new JLabel(labelName[count]);
    inputs[count] = new JTextField(10);
    panel1.add(labels[count]);
    panel1.add(inputs[count]);
   }
   
   //Creating a JPanel 2 with GridLayout of 1 row and 3 columns inside JInternalFrame
   panel2 = new JPanel();
   panel2.setLayout(new GridLayout(1,3));
   
   //Constructing JButton using "for loop" and add to JPanel 2
   for(int count=0; count<buttons.length; count++) {
    buttons[count] = new JButton(buttonName[count]);
    panel2.add(buttons[count]);
   }
   
   //Adding JPanel 1 and 2 to the JInternalFrame container
   container.add(panel1,BorderLayout.NORTH);
   container.add(panel2,BorderLayout.CENTER);
   
   frame.setTitle("Add New Data"); //Set the Title of the JInternalFrame
   frame.setResizable(false); //Lock the size of the JInternalFrame
   frame.setMaximizable(false); //Disable the Maximize function of JInternalFrame
   
   //Set the size of JInternalFrame to the size of its content
   frame.pack();
   
   //Attached the JInternalFrame to JDesktopPane and show it by setting the visible in to "true"
   desktopTest.add(frame);
   frame.setVisible(true);
   }
  }
  );

     /**Set all the Components Visible.
      * If it is set to "false", the components in the container will not be visible.
      */
     setVisible(true);
    }
    
 //Main Method
    public static void main (String[] args) {
     createJDesktoPane dp = new createJDesktoPane();
 }
}

Implementing Event Listener on JMenuItem

Program Description:

Since we already know the basics of JMenuBar, JMenu, and JMenuItem from adding icons, creating Sub-Menus, and combining the three components in to one. We are now going to move on to the event implementation where the menus are going to interact with the user. The Java Program below is a simple code on how to implement and event listener on JMenuItem.

Output:
Code:

/**
 * File: JMenuItemEventListener.java
 * Tiltle: Implementing Event Listener on JMenuItem
 * Author: http://java-program-sample.blogspot.com/
 */

//Java Core Package
import javax.swing.*;
//Java Extension Package
import java.awt.*;
import java.awt.event.*;

public class JMenuItemEventListener extends JFrame {
 
 //Initializing the program Components
 private JMenu fileMenu;
 private JMenuBar menuBar;
 private JMenuItem menuItems[];
 private JMenuItem exit;
 private String items[] = {"New ...","Open ...","Save ..."};
 private char itemMnemonics[] = {'N','O','C','E'};
 private String iconFile[] = {"new.gif","open.gif","save.gif"};
 private Icon icons[];
 private JLabel display;

 //Setting up GUI
    public JMenuItemEventListener() {
     
     //Setting up the Title of the Window
     super("Implementing Event Listener on JMenuItem");

     //Set Size of the Window (WIDTH, HEIGHT)
     setSize(400,200);

     //Exit Property of the Window
     setDefaultCloseOperation(JFrame.EXIT_ON_CLOSE);

  //Constructing JMenu, JMenuBar, JMenuItem, and JLabel
     fileMenu = new JMenu("File");
     menuBar = new JMenuBar();
     menuItems = new JMenuItem[3];
     display = new JLabel("Waiting for Event...", SwingConstants.CENTER); //Display JLabel in the Center
     
     fileMenu.setMnemonic('F'); //Add mnemonic on the JMenu "File"
     menuBar.add(fileMenu); //Adding the JMenu to JMenuBar
     
     //Constructing 3 JMenuItem using "for loop"
     for(int count=0; count<menuItems.length; count++) {
      menuItems[count] = new JMenuItem(items[count],new ImageIcon(iconFile[count])); //Constructing JMenuItem with the Specified String menus and icons
      menuItems[count].setMnemonic(itemMnemonics[count]); //Adding mnemonics on JMenuItem
      fileMenu.add(menuItems[count]); //Add JMenuItem on JMenu
     }
     
     fileMenu.addSeparator(); //Creating a separator to separate exit from New, Open, and Close
     
     exit = new JMenuItem("Exit ..."); //Constructing JMenuItem "Exit"
     exit.setMnemonic('E'); //Set JMenuItem "Exit" Mnemonic
     fileMenu.add(exit); //Adding JMenuItem "Exit" to JMenu
     
     //Setting up the JMenuBar in the container or automtically add JMenuBar in the container
     setJMenuBar(menuBar);
     
     //Setting up the container ready for the components to be added.
     Container pane = getContentPane();
     setContentPane(pane);
     
     //Implementing Event Listener on JMenuItem[0] which is "New"
     menuItems[0].addActionListener(
  new ActionListener() {
   
   //Handle JMenuItem event if mouse is clicked.
   public void actionPerformed(ActionEvent event) {
    //Display this message using JLabel if selected JMenuItem is clicked
    display.setText("New Item Menu is Selected");
   }
  }
  );
  
  //Implementing Event Listener on JMenuItem[1] which is "Open"
  menuItems[1].addActionListener(
  new ActionListener() {
   
   //Handle JMenuItem event if mouse is clicked.
   public void actionPerformed(ActionEvent event) {
    //Display this message using JLabel if selected JMenuItem is clicked
    display.setText("Open Item Menu is Selected");
   }
  }
  );
  
  //Implementing Event Listener on JMenuItem[2] which is "Save"
  menuItems[2].addActionListener(
  new ActionListener() {
   
   //Handle JMenuItem event if mouse is clicked.
   public void actionPerformed(ActionEvent event) {
    //Display this message using JLabel if selected JMenuItem is clicked
    display.setText("Save Item Menu is Selected");
   }
  }
  );
  
  //Implementing Event Listener on JMenuItem exit
  exit.addActionListener(
  new ActionListener() {
   
   //Handle JMenuItem event if mouse is clicked.
   public void actionPerformed(ActionEvent event) {
    
    System.exit(0); //Exit the Application
   }
  }
  );
     
     //Add JLabel display in the container
     pane.add(display, BorderLayout.CENTER);

     /**Set all the Components Visible.
      * If it is set to "false", the components in the container will not be visible.
      */
     setVisible(true);
    }
    
 //Main Method
    public static void main (String[] args) {
     JMenuItemEventListener jiel = new JMenuItemEventListener();
 }
}

Important Part of the Program:

//Constructing JMenu, JMenuBar, JMenuItem, and JLabel
     fileMenu = new JMenu("File");
     menuBar = new JMenuBar();
     menuItems = new JMenuItem[3];
     display = new JLabel("Waiting for Event...", SwingConstants.CENTER); //Display JLabel in the Center
     
     fileMenu.setMnemonic('F'); //Add mnemonic on the JMenu "File"
     menuBar.add(fileMenu); //Adding the JMenu to JMenuBar
     
     //Constructing 3 JMenuItem using "for loop"
     for(int count=0; count<menuItems.length; count++) {
      menuItems[count] = new JMenuItem(items[count],new ImageIcon(iconFile[count])); //Constructing JMenuItem with the Specified String menus and icons
      menuItems[count].setMnemonic(itemMnemonics[count]); //Adding mnemonics on JMenuItem
      fileMenu.add(menuItems[count]); //Add JMenuItem on JMenu
     }
     
     fileMenu.addSeparator(); //Creating a separator to separate exit from New, Open, and Close
     
     exit = new JMenuItem("Exit ..."); //Constructing JMenuItem "Exit"
     exit.setMnemonic('E'); //Set JMenuItem "Exit" Mnemonic
     fileMenu.add(exit); //Adding JMenuItem "Exit" to JMenu
     
     //Setting up the JMenuBar in the container or automtically add JMenuBar in the container
     setJMenuBar(menuBar);

//Implementing Event Listener on JMenuItem[0] which is "New"
     menuItems[0].addActionListener(
  new ActionListener() {
   
   //Handle JMenuItem event if mouse is clicked.
   public void actionPerformed(ActionEvent event) {
    //Display this message using JLabel if selected JMenuItem is clicked
    display.setText("New Item Menu is Selected");
   }
  }
  );
  
  //Implementing Event Listener on JMenuItem[1] which is "Open"
  menuItems[1].addActionListener(
  new ActionListener() {
   
   //Handle JMenuItem event if mouse is clicked.
   public void actionPerformed(ActionEvent event) {
    //Display this message using JLabel if selected JMenuItem is clicked
    display.setText("Open Item Menu is Selected");
   }
  }
  );
  
  //Implementing Event Listener on JMenuItem[2] which is "Save"
  menuItems[2].addActionListener(
  new ActionListener() {
   
   //Handle JMenuItem event if mouse is clicked.
   public void actionPerformed(ActionEvent event) {
    //Display this message using JLabel if selected JMenuItem is clicked
    display.setText("Save Item Menu is Selected");
   }
  }
  );
  
  //Implementing Event Listener on JMenuItem exit
  exit.addActionListener(
  new ActionListener() {
   
   //Handle JMenuItem event if mouse is clicked.
   public void actionPerformed(ActionEvent event) {
    
    System.exit(0); //Exit the Application
   }
  }
  );

Creating a Sub JMenuItem

Program Description:

The Java Program below demonstrates how to add a JMenu under a JMenu and create a JMenuItem as a sub-menu. "File" is the parent JMenu, "Main Menu" is the child JMenu, and the "Sub Menu 1 - 5" are the JMenuItem. You have to take note that JMenuItem can only be used once in every JMenu so this code won't work:

subItems = new JMenuItem[5];
     
     for(int count=0; count<subItems.length; count++){
      subItems[count] = new JMenuItem("Sub Menu "+(count+1));
      mainItem[count].add(subItems[count]); //Adding JMenuItem "subItems" in the JMenu "mainItem"
     }

this will create an error on line 5 because you are assigning the JMenuItem on every JMenu. The rule is, JMenuItem(s) can only be assigned in to one JMenu so the code goes like this:

subItems = new JMenuItem[5];
     
     for(int count=0; count<subItems.length; count++){
      subItems[count] = new JMenuItem("Sub Menu "+(count+1));
      mainItem[0].add(subItems[count]); //Adding JMenuItem "subItems" in the JMenu "mainItem"
     }

You have to specify a JMenu where the JMenuItem is added.

Output:
Code:

/**
 * File: creatingSubJMenuItem.java
 * Tiltle: Creating a Sub JMenuItem
 * Author: http://java-program-sample.blogspot.com/
 */

//Java Core Package
import javax.swing.*;
//Java Extension Package
import java.awt.*;

public class creatingSubJMenuItem extends JFrame {
 
 //Initializing program components
 private JMenu menus;
 private JMenuBar bar;
 private JMenu mainItem[];
 private JMenuItem subItems[];

 //Setting up GUI
    public creatingSubJMenuItem() {
     
     //Setting up the Title of the Window
     super("Creating a Sub JMenuItem");

     //Set Size of the Window (WIDTH, HEIGHT)
     setSize(350,200);

     //Exit Property of the Window
     setDefaultCloseOperation(JFrame.EXIT_ON_CLOSE);
  
  //Constructing JMenu "File" with mnemonic 'F'
     menus = new JMenu("File");
     menus.setMnemonic('F');
     
     //Constructing main JMenu and add it in JMenu "File"
     mainItem = new JMenu[1];
     
     for(int count=0; count<mainItem.length; count++){
      mainItem[count] = new JMenu("Main Menu "+(count+1));
      menus.add(mainItem[count]); //Adding JMenu "mainItem" in the JMenu "File"
     }
     
     //Constructing JMenuItem "subItems" as a Sub Menu to the main JMenu
     subItems = new JMenuItem[5];
     
     for(int count=0; count<subItems.length; count++){
      subItems[count] = new JMenuItem("Sub Menu "+(count+1));
      mainItem[0].add(subItems[count]); //Adding JMenuItem "subItems" in the JMenu "mainItem"
     }
     
     //Constructing JMenuBar
     bar = new JMenuBar();
     bar.add(menus); //Adding the JMenu "File" in the JMenuBar
     
     //Setting up the JMenuBar in the container
     setJMenuBar(bar);

     //Setting up the container ready for the components to be added.
     Container pane = getContentPane();
     setContentPane(pane);

     /**Set all the Components Visible.
      * If it is set to "false", the components in the container will not be visible.
      */
     setVisible(true);
    }
    
 //Main Method
    public static void main (String[] args) {
     creatingSubJMenuItem csjmi = new creatingSubJMenuItem();
 }
}

Important Part of the Program:

//Constructing JMenu "File" with mnemonic 'F'
     menus = new JMenu("File");
     menus.setMnemonic('F');
     
     //Constructing main JMenu and add it in JMenu "File"
     mainItem = new JMenu[1];
     
     for(int count=0; count<mainItem.length; count++){
      mainItem[count] = new JMenu("Main Menu "+(count+1));
      menus.add(mainItem[count]); //Adding JMenu "mainItem" in the JMenu "File"
     }
     
     //Constructing JMenuItem "subItems" as a Sub Menu to the main JMenu
     subItems = new JMenuItem[5];
     
     for(int count=0; count<subItems.length; count++){
      subItems[count] = new JMenuItem("Sub Menu "+(count+1));
      mainItem[0].add(subItems[count]); //Adding JMenuItem "subItems" in the JMenu "mainItem"
     }
     
     //Constructing JMenuBar
     bar = new JMenuBar();
     bar.add(menus); //Adding the JMenu "File" in the JMenuBar
     
     //Setting up the JMenuBar in the container
     setJMenuBar(bar);

Friday, September 9, 2011

Adding Icons JMenuItem and Separator on JMenu

Program Description:

Another fun part in making java program is adding icons in JMenuItem which give more life to your program. The Java program below is a short simple java code that demonstrates on how to add icons in JMenuItem. The required images are:

Place the images inside the folder where your java program is.

Output:
Code:

/**
 * File: addIconsAndSeparator.java
 * Tiltle: Adding Icons JMenuItem and Separator on JMenu
 * Author: http://java-program-sample.blogspot.com/
 */

//Java Core Package
import javax.swing.*;
//Java Extension Package
import java.awt.*;

public class addIconsAndSeparator extends JFrame {
 
 //Initializing the program Components
 private JMenu fileMenu;
 private JMenuBar menuBar;
 private JMenuItem menuItems[];
 private JMenuItem exit;
 private String items[] = {"New ...","Open ...","Save ..."};
 private char itemMnemonics[] = {'N','O','C','E'};
 private String iconFile[] = {"new.gif","open.gif","save.gif"};
 private Icon icons[];

 //Setting up GUI
    public addIconsAndSeparator() {
     
     //Setting up the Title of the Window
     super("Adding Icons JMenuItem and Separator on JMenu");

     //Set Size of the Window (WIDTH, HEIGHT)
     setSize(400,200);

     //Exit Property of the Window
     setDefaultCloseOperation(JFrame.EXIT_ON_CLOSE);

  //Constructing JMenu, JMenuBar, and JMenuItem
     fileMenu = new JMenu("File");
     menuBar = new JMenuBar();
     menuItems = new JMenuItem[3];
     
     fileMenu.setMnemonic('F'); //Add mnemonic on the JMenu "File"
     menuBar.add(fileMenu); //Adding the JMenu to JMenuBar
     
     //Constructing 3 JMenuItem using "for loop"
     for(int count=0; count<menuItems.length; count++) {
      menuItems[count] = new JMenuItem(items[count],new ImageIcon(iconFile[count])); //Constructing JMenuItem with the Specified String menus and icons
      menuItems[count].setMnemonic(itemMnemonics[count]); //Adding mnemonics on JMenuItem
      fileMenu.add(menuItems[count]); //Add JMenuItem on JMenu
     }
     
     fileMenu.addSeparator(); //Creating a separator to separate exit from New, Open, and Close
     
     exit = new JMenuItem("Exit ..."); //Constructing JMenuItem "Exit"
     exit.setMnemonic('E'); //Set JMenuItem "Exit" Mnemonic
     fileMenu.add(exit); //Adding JMenuItem "Exit" to JMenu
     
     //Setting up the JMenuBar in the container or automtically add JMenuBar in the container
     setJMenuBar(menuBar);
     
     //Setting up the container ready for the components to be added.
     Container pane = getContentPane();
     setContentPane(pane);   

     /**Set all the Components Visible.
      * If it is set to "false", the components in the container will not be visible.
      */
     setVisible(true);
    }
    
 //Main Method
    public static void main (String[] args) {
     addIconsAndSeparator aias = new addIconsAndSeparator();
 }
}

Important Part of the Program:

//Constructing JMenu, JMenuBar, and JMenuItem
     fileMenu = new JMenu("File");
     menuBar = new JMenuBar();
     menuItems = new JMenuItem[3];
     
     fileMenu.setMnemonic('F'); //Add mnemonic on the JMenu "File"
     menuBar.add(fileMenu); //Adding the JMenu to JMenuBar
     
     //Constructing 3 JMenuItem using "for loop"
     for(int count=0; count<menuItems.length; count++) {
      menuItems[count] = new JMenuItem(items[count],new ImageIcon(iconFile[count])); //Constructing JMenuItem with the Specified String menus and icons
      menuItems[count].setMnemonic(itemMnemonics[count]); //Adding mnemonics on JMenuItem
      fileMenu.add(menuItems[count]); //Add JMenuItem on JMenu
     }
     
     fileMenu.addSeparator(); //Creating a separator to separate exit from New, Open, and Close
     
     exit = new JMenuItem("Exit ..."); //Constructing JMenuItem "Exit"
     exit.setMnemonic('E'); //Set JMenuItem "Exit" Mnemonic
     fileMenu.add(exit); //Adding JMenuItem "Exit" to JMenu
     
     //Setting up the JMenuBar in the container or automtically add JMenuBar in the container
     setJMenuBar(menuBar);

Adding JMenuItem on JMenu

Program Description:

The program below is a simple short java code on how to add a JMenuItem in a JMenu. JMenuItem is a drop-down menu component inside JMenu where you add Icons and implement Event Listener.

Output:
Code:

/**
 * File: addJMenuItemOnJMenu.java
 * Tiltle: Adding JMenuItem on JMenu
 * Author: http://java-program-sample.blogspot.com/
 */

//Java Core Package
import javax.swing.*;
//Java Extension Package
import java.awt.*;

public class addJMenuItemOnJMenu extends JFrame {
 
 //Initializing JMenu, JMenuBar, JMenuItem, specified JMenuItem strings, and JMenuItem Mnemonics
 private JMenu fileMenu;
 private JMenuBar menuBar;
 private JMenuItem menuItems[];
 private String items[] = {"New ...","Open ...","Close ...","Exit ..."};
 private char itemMnemonics[] = {'N','O','C','E'};

 //Setting up GUI
    public addJMenuItemOnJMenu() {
     
     //Setting up the Title of the Window
     super("Adding JMenuItem on JMenu");

     //Set Size of the Window (WIDTH, HEIGHT)
     setSize(350,200);

     //Exit Property of the Window
     setDefaultCloseOperation(JFrame.EXIT_ON_CLOSE);

  //Constructing JMenu, JMenuBar, and JMenuItem
     fileMenu = new JMenu("File");
     menuBar = new JMenuBar();
     menuItems = new JMenuItem[4];
     
     fileMenu.setMnemonic('F'); //Add mnemonic on the JMenu "File"
     menuBar.add(fileMenu); //Adding JMenu on JMenuBar
     
     //Constructing JMenuItem using "for loop"
     for(int count=0; count<menuItems.length; count++) {
      menuItems[count] = new JMenuItem(items[count]); //Constructing JMenuItem with the Specified String menus
      menuItems[count].setMnemonic(itemMnemonics[count]); //Adding mnemonics on JMenuItem
      fileMenu.add(menuItems[count]); //Add JMenuItem on JMenu
     }
     
     //Setting up the JMenuBar in the container or automtically add JMenuBar in the container
     setJMenuBar(menuBar);
     
     //Setting up the container ready for the components to be added.
     Container pane = getContentPane();
     setContentPane(pane);   

     /**Set all the Components Visible.
      * If it is set to "false", the components in the container will not be visible.
      */
     setVisible(true);
    }
    
 //Main Method
    public static void main (String[] args) {
     addJMenuItemOnJMenu ajmi = new addJMenuItemOnJMenu();
 }
}

Important Part of the Program:

//Constructing JMenu, JMenuBar, and JMenuItem
     fileMenu = new JMenu("File");
     menuBar = new JMenuBar();
     menuItems = new JMenuItem[4];
     
     fileMenu.setMnemonic('F'); //Add mnemonic on the JMenu "File"
     menuBar.add(fileMenu); //Adding JMenu on JMenuBar
     
     //Constructing JMenuItem using "for loop"
     for(int count=0; count<menuItems.length; count++) {
      menuItems[count] = new JMenuItem(items[count]); //Constructing JMenuItem with the Specified String menus
      menuItems[count].setMnemonic(itemMnemonics[count]); //Adding mnemonics on JMenuItem
      fileMenu.add(menuItems[count]); //Add JMenuItem on JMenu
     }
     
     //Setting up the JMenuBar in the container or automtically add JMenuBar in the container
     setJMenuBar(menuBar);

Sunday, September 4, 2011

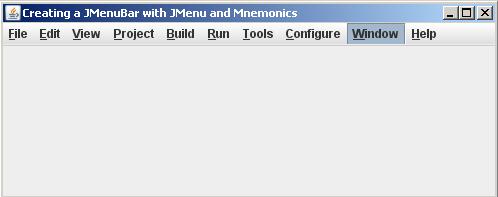
Creating a JMenuBar with JMenu and Mnemonics

Program Description:

One of the interesting part in programming java that I enjoyed the most is making JMenu, JMenuBar, and JMenuItem because it looks good in the program and it helps you manage and organize everything that is in your program. It is considered as one of the important part of a software. What I like about making JMenu, JMenuBar, and JMenuItem in Java is that it is very easy to create and understand.

Output:
Code:

/**
 * File: menuBarWithMenu.java
 * Tiltle: Creating a JMenuBar with JMenu and Mnemonics
 * Author: http://java-program-sample.blogspot.com/
 */

//Java Core Package
import javax.swing.*;
//Java Extension Package
import java.awt.*;

public class menuBarWithMenu extends JFrame {
	
	//Initializing JMenu, JMenuBar, Mnemonics, and Specified Menu Strings
	private String menuNames[] = {"File","Edit","View","Project","Build","Run","Tools","Configure","Window","Help"};
	private char mnemonic[] = {'F','E','V','P','B','R','T','C','W','H'};
	private JMenu fileMenu[];
	private JMenuBar menuBar;

	//Setting up GUI
    public menuBarWithMenu() {
    	
    	//Setting up the Title of the Window
    	super("Creating a JMenuBar with JMenu and Mnemonics");

    	//Set Size of the Window (WIDTH, HEIGHT)
    	setSize(500,200);

    	//Exit Property of the Window
    	setDefaultCloseOperation(JFrame.EXIT_ON_CLOSE);

		//Constructing JMenu and JMenuBar
    	fileMenu = new JMenu[10];
    	menuBar = new JMenuBar();
    	
    	//Setting up the JMenuBar in the container or automtically add JMenuBar in the container
    	setJMenuBar(menuBar);
    	
    	//Constructing 10 JMenu using "for loop" with Mnemonics and automatically add it in the JMenuBar
    	for(int count=0; count<fileMenu.length; count++) {
    		fileMenu[count] = new JMenu(menuNames[count]); //Constructing JMenu using the specified strings above
    		fileMenu[count].setMnemonic(mnemonic[count]); //Adding mnemonics on JMenu using the specified characters above
    		menuBar.add(fileMenu[count]); //Adding all 10 JMenu in the JMenuBar
    	}

    	//Setting up the container ready for the components to be added.
    	Container pane = getContentPane();
    	setContentPane(pane);  	

    	/**Set all the Components Visible.
    	 * If it is set to "false", the components in the container will not be visible.
    	 */
    	setVisible(true);
    }
    
	//Main Method
    public static void main (String[] args) {
    	menuBarWithMenu mbwm = new menuBarWithMenu();
	}
}

Basic JPanel Borders

Program Description:

The Java Program below is just a simple java code showing different JPanel borders. I have created 15 types of JPanel borders that is commonly used but there are more borders available using BorderFactory class, all you have to do is explore. The purpose of this program is to show how to use the class BorderFactory in creating different kinds of borders.

Output:
Code:

/**
 * File: jpanelBorders.java
 * Tiltle: Basic JPanel Borders
 * Author: http://java-program-sample.blogspot.com/
 */

//Java Core Package
import javax.swing.*;
//Java Extension Package
import java.awt.*;

public class jpanelBorders extends JFrame {
	
	//Initializing JPanel
	private JPanel panels[];

	//Setting up GUI
    public jpanelBorders() {
    	
    	//Setting up the Title of the Window
    	super("Basic JPanel Borders");

    	//Set Size of the Window (WIDTH, HEIGHT)
    	setSize(600,300);

    	//Exit Property of the Window
    	setDefaultCloseOperation(JFrame.EXIT_ON_CLOSE);

    	//Constructing JPanel
    	panels = new JPanel[15];

    	//Setting up the container ready for the components to be added.
    	Container pane = getContentPane();
    	setContentPane(pane);

    	//Setting up the container layout
    	GridLayout grid = new GridLayout(3,5);
    	pane.setLayout(grid);
    	
    	//Constructing 15 JPanels using "for loop" and add automatically in the container
    	for(int count = 0; count<panels.length; count++) {
    		panels[count] = new JPanel();
    		pane.add(panels[count]);
    	}
    	
    	//Beveled Borders
    	panels[0].setBorder(BorderFactory.createBevelBorder(0));
    	panels[1].setBorder(BorderFactory.createBevelBorder(1));
    	panels[2].setBorder(BorderFactory.createBevelBorder(0, Color.red, Color.green));
    	panels[3].setBorder(BorderFactory.createBevelBorder(1, Color.red, Color.green));
    	panels[4].setBorder(BorderFactory.createBevelBorder(0, Color.red, Color.green, Color.blue, Color.cyan));
    	panels[5].setBorder(BorderFactory.createBevelBorder(1, Color.red, Color.green, Color.blue, Color.cyan));
    	
    	//Line Borders
    	panels[6].setBorder(BorderFactory.createLineBorder(Color.blue));
    	panels[7].setBorder(BorderFactory.createLineBorder(Color.blue,10));
    	
    	//Titled Border
    	panels[8].setBorder(BorderFactory.createTitledBorder("String Border"));
    	panels[9].setBorder(BorderFactory.createTitledBorder(BorderFactory.createEtchedBorder(1), "Custom SB"));
    	
    	//Etched Border
    	panels[10].setBorder(BorderFactory.createEtchedBorder(0));
    	panels[11].setBorder(BorderFactory.createEtchedBorder(1));
    	panels[12].setBorder(BorderFactory.createEtchedBorder(Color.red, Color.blue));
    	panels[13].setBorder(BorderFactory.createEtchedBorder(0, Color.black, Color.cyan));
    	panels[14].setBorder(BorderFactory.createEtchedBorder(1, Color.black, Color.cyan));

    	/**Set all the Components Visible.
    	 * If it is set to "false", the components in the container will not be visible.
    	 */
    	setVisible(true);
    }
    
	//Main Method
    public static void main (String[] args) {
    	jpanelBorders jpb = new jpanelBorders();
	}
}

Important Part of the Program:

//Constructing 15 JPanels using "for loop" and add automatically in the container
    	for(int count = 0; count<panels.length; count++) {
    		panels[count] = new JPanel();
    		pane.add(panels[count]);
    	}
    	
    	//Beveled Borders
    	panels[0].setBorder(BorderFactory.createBevelBorder(0));
    	panels[1].setBorder(BorderFactory.createBevelBorder(1));
    	panels[2].setBorder(BorderFactory.createBevelBorder(0, Color.red, Color.green));
    	panels[3].setBorder(BorderFactory.createBevelBorder(1, Color.red, Color.green));
    	panels[4].setBorder(BorderFactory.createBevelBorder(0, Color.red, Color.green, Color.blue, Color.cyan));
    	panels[5].setBorder(BorderFactory.createBevelBorder(1, Color.red, Color.green, Color.blue, Color.cyan));
    	
    	//Line Borders
    	panels[6].setBorder(BorderFactory.createLineBorder(Color.blue));
    	panels[7].setBorder(BorderFactory.createLineBorder(Color.blue,10));
    	
    	//Titled Border
    	panels[8].setBorder(BorderFactory.createTitledBorder("String Border"));
    	panels[9].setBorder(BorderFactory.createTitledBorder(BorderFactory.createEtchedBorder(1), "Custom SB"));
    	
    	//Etched Border
    	panels[10].setBorder(BorderFactory.createEtchedBorder(0));
    	panels[11].setBorder(BorderFactory.createEtchedBorder(1));
    	panels[12].setBorder(BorderFactory.createEtchedBorder(Color.red, Color.blue));
    	panels[13].setBorder(BorderFactory.createEtchedBorder(0, Color.black, Color.cyan));
    	panels[14].setBorder(BorderFactory.createEtchedBorder(1, Color.black, Color.cyan));

Saturday, August 27, 2011

JLabel Positions

Program Description:

The Java program below is a JLabel demonstration that shows different JLabel positions.

Output:
Code:

/**
 * File: jlablePositions.java
 * Tiltle: JLabel Positions
 * Author: http://java-program-sample.blogspot.com/
 */

//Java Extension Packages
import javax.swing.*;
//Java Core Packages
import java.awt.*;

public class jlablePositions extends JFrame {

	//Setting up GUI
	public jlablePositions() {
		
	//Setting up the Title of the Window
	super("JLabel Positions");

	//Set Size of the Window (WIDTH, HEIGHT)
	setSize(350,200);

	//Exit Property of the Frame of Window
	setDefaultCloseOperation(JFrame.EXIT_ON_CLOSE);

	//Constructing JLabel with different positions
	JLabel trailing = new JLabel("TRAILING POSITION",JLabel.TRAILING);
	JLabel left = new JLabel("LEFT POSITION",JLabel.LEFT);
	JLabel right = new JLabel("RIGHT POSITION",JLabel.RIGHT);
	JLabel center = new JLabel("CENTER POSITION",JLabel.CENTER);
	JLabel leading = new JLabel("LEADING POSITION",JLabel.LEADING);
	
	//Setting up the container ready for the components to be added
	Container pane = getContentPane();

	//Setting the position of the JLabel
	GridLayout flo = new GridLayout(5,1);

	//Adding the Layout and JLabel in the container
	pane.setLayout(flo);
	pane.add(trailing);
	pane.add(left);
	pane.add(right);
	pane.add(center);
	pane.add(leading);
	setContentPane(pane);
	setVisible(true);
	}
	
	//Main Method
	public static void main(String[] args) {
	jlablePositions jls = new jlablePositions();
	}
}

Important Part of the Program:

//Constructing JLabel with different positions
	JLabel trailing = new JLabel("TRAILING POSITION",JLabel.TRAILING);
	JLabel left = new JLabel("LEFT POSITION",JLabel.LEFT);
	JLabel right = new JLabel("RIGHT POSITION",JLabel.RIGHT);
	JLabel center = new JLabel("CENTER POSITION",JLabel.CENTER);
	JLabel leading = new JLabel("LEADING POSITION",JLabel.LEADING);

Arithmetic Operation using JOptionPane

Program Description:

The program below is a simple java code arithmetic operation using JButton as arithmetic operator selector and JOptionPane as user input. It is also capable of catching number format error like putting non-integer numbers.

Output:


Code:

/**
 * File: arithmeticOperationJOptionPane.java
 * Tiltle: Arithmetic Operation using JOptionPane
 * Author: http://java-program-sample.blogspot.com/
 */

//Java Core Package
import javax.swing.*;
//Java Extension Package
import java.awt.*;
import java.awt.event.*;

public class arithmeticOperationJOptionPane extends JFrame {
	
	//Initializing JButton and String operation as the label of each JButton
	private JButton buttons[];
	private String operation[] = {"Addition [+]","Subtraction [-]","Multiplication [x]","Division [/]"};

	//Setting up GUI
    public arithmeticOperationJOptionPane() {
    	
    	//Setting up the Title of the Window
    	super("Arithmetic Operation using JOptionPane");

    	//Set Size of the Window (WIDTH, HEIGHT)
    	setSize(320,120);

    	//Exit Property of the Window
    	setDefaultCloseOperation(JFrame.EXIT_ON_CLOSE);
    	
    	//Constructing JButton with a array size of 4
    	buttons = new JButton[4];
    	
    	//Setting up the container ready for the components to be added.
    	Container pane = getContentPane();
    	setContentPane(pane);

    	//Setting up the container layout
    	GridLayout grid = new GridLayout(2,2);
    	pane.setLayout(grid);
    	
    	//Constructing all 4 JButtons using "for loop" and add them in the container
    	for(int count=0; count<buttons.length; count++) {
    		buttons[count] = new JButton(operation[count]);
    		pane.add(buttons[count]);
    	}
		
		//Implemeting Even-Listener on JButton button[0] which is addition
		buttons[0].addActionListener(
		new ActionListener() {
			
			//Handle JButton event if it is clicked
			public void actionPerformed(ActionEvent event) {
				try { //fetch an error using "try-catch" function.
				
				//Initializing important variables for operation
				String input1, input2;
				int num1, num2, result;
				
				//Making two JOptionPane inputs
				input1 = JOptionPane.showInputDialog("Please Input First Number: ");
				input2 = JOptionPane.showInputDialog("Please Input Second Number: ");
				
				//Converting the inputs to integer in order to do the Arithmetic operation by parsing the inputs.
				num1 = Integer.parseInt(input1);
				num2 = Integer.parseInt(input2);
				
				//Processing Arithmetic Operation
				result = num1 + num2;
				
				//Display the result using JOptionPane
				JOptionPane.showMessageDialog(null,result,"Result:",JOptionPane.INFORMATION_MESSAGE);
				} catch (NumberFormatException e){ //Catch the error if the user inputs a non-integer value
				
						//Display the error
						JOptionPane.showMessageDialog(null, "Please Input a Integer","Error",JOptionPane.ERROR_MESSAGE);
				}
			}
		}
		);
		
		//Implemeting Even-Listener on JButton button[1] which is subtraction
		buttons[1].addActionListener(
		new ActionListener() {
			
			//Handle JButton event if it is clicked
			public void actionPerformed(ActionEvent event) {
				try {
				String input1, input2;
				int num1, num2, result;
				
				input1 = JOptionPane.showInputDialog("Please Input First Number: ");
				input2 = JOptionPane.showInputDialog("Please Input Second Number: ");
				
				num1 = Integer.parseInt(input1);
				num2 = Integer.parseInt(input2);
				
				result = num1 - num2;
				
				JOptionPane.showMessageDialog(null,result,"Result:",JOptionPane.INFORMATION_MESSAGE);
				} catch (NumberFormatException e){
						JOptionPane.showMessageDialog(null, "Please Input a Integer","Error",JOptionPane.ERROR_MESSAGE);

				}
			}
		}
		);
		
		//Implemeting Even-Listener on JButton button[2] which is multiplication
		buttons[2].addActionListener(
		new ActionListener() {
			
			//Handle JButton event if it is clicked
			public void actionPerformed(ActionEvent event) {
				try {
				String input1, input2;
				int num1, num2, result;
				
				input1 = JOptionPane.showInputDialog("Please Input First Number: ");
				input2 = JOptionPane.showInputDialog("Please Input Second Number: ");
				
				num1 = Integer.parseInt(input1);
				num2 = Integer.parseInt(input2);
				
				result = num1 * num2;
				
				JOptionPane.showMessageDialog(null,result,"Result:",JOptionPane.INFORMATION_MESSAGE);
				} catch (NumberFormatException e){
						JOptionPane.showMessageDialog(null, "Please Input a Integer","Error",JOptionPane.ERROR_MESSAGE);

				}
			}
		}
		);
		
		//Implemeting Even-Listener on JButton button[3] which is division
		buttons[3].addActionListener(
		new ActionListener() {
			
			//Handle JButton event if it is clicked
			public void actionPerformed(ActionEvent event) {
				try {
				String input1, input2;
				int num1, num2, result;
				
				input1 = JOptionPane.showInputDialog("Please Input First Number: ");
				input2 = JOptionPane.showInputDialog("Please Input Second Number: ");
				
				num1 = Integer.parseInt(input1);
				num2 = Integer.parseInt(input2);
				
				result = num1 / num2;
				
				JOptionPane.showMessageDialog(null,result,"Result:",JOptionPane.INFORMATION_MESSAGE);
				} catch (NumberFormatException e){
						JOptionPane.showMessageDialog(null, "Please Input a Integer","Error",JOptionPane.ERROR_MESSAGE);

				}
			}
		}
		);
		
		buttons[0].setMnemonic('A');
		buttons[1].setMnemonic('S');
		buttons[2].setMnemonic('M');
		buttons[3].setMnemonic('D');
		
    	/**Set all the Components Visible.
    	 * If it is set to "false", the components in the container will not be visible.
    	 */
    	setVisible(true);
    	setResizable(false); //Fix window height and width
    }
    
	//Main Method
    public static void main (String[] args) {
    	arithmeticOperationJOptionPane pjtf = new arithmeticOperationJOptionPane();
	}
}

Important Part of the Program:

//Constructing all 4 JButtons using "for loop" and add them in the container
    	for(int count=0; count<buttons.length; count++) {
    		buttons[count] = new JButton(operation[count]);
    		pane.add(buttons[count]);
    	}
		
		//Implemeting Even-Listener on JButton button[0] which is addition
		buttons[0].addActionListener(
		new ActionListener() {
			
			//Handle JButton event if it is clicked
			public void actionPerformed(ActionEvent event) {
				try { //fetch an error using "try-catch" function.
				
				//Initializing important variables for operation
				String input1, input2;
				int num1, num2, result;
				
				//Making two JOptionPane inputs
				input1 = JOptionPane.showInputDialog("Please Input First Number: ");
				input2 = JOptionPane.showInputDialog("Please Input Second Number: ");
				
				//Converting the inputs to integer in order to do the Arithmetic operation by parsing the inputs.
				num1 = Integer.parseInt(input1);
				num2 = Integer.parseInt(input2);
				
				//Processing Arithmetic Operation
				result = num1 + num2;
				
				//Display the result using JOptionPane
				JOptionPane.showMessageDialog(null,result,"Result:",JOptionPane.INFORMATION_MESSAGE);
				} catch (NumberFormatException e){ //Catch the error if the user inputs a non-integer value
				
						//Display the error
						JOptionPane.showMessageDialog(null, "Please Input a Integer","Error",JOptionPane.ERROR_MESSAGE);
				}
			}
		}
		);
		
		//Implemeting Even-Listener on JButton button[1] which is subtraction
		buttons[1].addActionListener(
		new ActionListener() {
			
			//Handle JButton event if it is clicked
			public void actionPerformed(ActionEvent event) {
				try {
				String input1, input2;
				int num1, num2, result;
				
				input1 = JOptionPane.showInputDialog("Please Input First Number: ");
				input2 = JOptionPane.showInputDialog("Please Input Second Number: ");
				
				num1 = Integer.parseInt(input1);
				num2 = Integer.parseInt(input2);
				
				result = num1 - num2;
				
				JOptionPane.showMessageDialog(null,result,"Result:",JOptionPane.INFORMATION_MESSAGE);
				} catch (NumberFormatException e){
						JOptionPane.showMessageDialog(null, "Please Input a Integer","Error",JOptionPane.ERROR_MESSAGE);

				}
			}
		}
		);
		
		//Implemeting Even-Listener on JButton button[2] which is multiplication
		buttons[2].addActionListener(
		new ActionListener() {
			
			//Handle JButton event if it is clicked
			public void actionPerformed(ActionEvent event) {
				try {
				String input1, input2;
				int num1, num2, result;
				
				input1 = JOptionPane.showInputDialog("Please Input First Number: ");
				input2 = JOptionPane.showInputDialog("Please Input Second Number: ");
				
				num1 = Integer.parseInt(input1);
				num2 = Integer.parseInt(input2);
				
				result = num1 * num2;
				
				JOptionPane.showMessageDialog(null,result,"Result:",JOptionPane.INFORMATION_MESSAGE);
				} catch (NumberFormatException e){
						JOptionPane.showMessageDialog(null, "Please Input a Integer","Error",JOptionPane.ERROR_MESSAGE);

				}
			}
		}
		);
		
		//Implemeting Even-Listener on JButton button[3] which is division
		buttons[3].addActionListener(
		new ActionListener() {
			
			//Handle JButton event if it is clicked
			public void actionPerformed(ActionEvent event) {
				try {
				String input1, input2;
				int num1, num2, result;
				
				input1 = JOptionPane.showInputDialog("Please Input First Number: ");
				input2 = JOptionPane.showInputDialog("Please Input Second Number: ");
				
				num1 = Integer.parseInt(input1);
				num2 = Integer.parseInt(input2);
				
				result = num1 / num2;
				
				JOptionPane.showMessageDialog(null,result,"Result:",JOptionPane.INFORMATION_MESSAGE);
				} catch (NumberFormatException e){
						JOptionPane.showMessageDialog(null, "Please Input a Integer","Error",JOptionPane.ERROR_MESSAGE);

				}
			}
		}
		);

Thursday, August 25, 2011

Display Image Using JList

Program Description:

The program below is a Java Program JList demonstration that allows you to display image in a JPanel by clicking or selecting an item in a JList. Each item has designated image which is controlled by an array in line 19-21. To understand more, see the "Important Part of the Program" section and look at line 19-21 and see how it worked.

Output:

Code:

/**
 * File: displayImageUsingJList.java
 * Tiltle: Display Image Using JList
 * Author: http://java-program-sample.blogspot.com/
 */

//Java Core Package
import javax.swing.*;
import javax.swing.event.*;
//Java Extension Package
import java.awt.*;

public class displayImageUsingJList extends JFrame {
	
	//Initializing JList, JPanel, JLabel, String classes and names and the class Icon
	private JList list;
	private JPanel p1,p2;
	private JLabel image;
	private String names[] = {"Orcs","Mage","Dwarf","Warrior","Elf"};
	private String classes[] = {"orcs.jpg","mage.jpg","dwarf.jpg","warrior.jpg","elf.jpg"};
	private Icon graphics[] = {new ImageIcon(classes[0]),new ImageIcon(classes[1]),new ImageIcon(classes[2]),new ImageIcon(classes[3]),new ImageIcon(classes[4])};

	//Setting up GUI
    public displayImageUsingJList() {
    	
    	//Setting up the Title of the Window
    	super("Display Image Using JList");

    	//Set Size of the Window (WIDTH, LENGTH)
    	setSize(540,290);

    	//Exit Property of the Window
    	setDefaultCloseOperation(JFrame.EXIT_ON_CLOSE);
    	
    	//Constructing JLabel which is going to be used to display images
    	image = new JLabel("Image Display Here");
		
		//Constructing JList and its property
		list = new JList(names);
		list.setVisibleRowCount(4);
		list.setFixedCellHeight(30);
		list.setFixedCellWidth(235);
		list.setSelectionMode(ListSelectionModel.SINGLE_SELECTION);
		
		//Constructing JPanel with border
    	p1 = new JPanel();
    	p1.setBorder(BorderFactory.createTitledBorder("Select Image: "));
    	p1.add(new JScrollPane(list)); //Adding JList in JPanel 1 with JScrollPane that automatically creates Horizontal and Vertical Scroll bar
    	
    	//Constructing JPanel 2 with border
    	p2 = new JPanel();
    	p2.setBorder(BorderFactory.createTitledBorder("Image Preview: "));
    	p2.add(image); //Adding JLabel image in JPanel 2 where the images are to be displayed

    	//Setting up the container ready for the components to be added.
    	Container pane = getContentPane();
    	setContentPane(pane);

		//Setting up the container layout
    	GridLayout grid = new GridLayout(1,2);
    	pane.setLayout(grid);
    	
    	//Set up event handler on JList
    	list.addListSelectionListener(
    		
    		//Handle JList event if selected index is click
    		new ListSelectionListener() {
    			public void valueChanged(ListSelectionEvent event) {
    				
    				image.setText(null); //set the label to null ready for the image to be displayed
    				image.setIcon(graphics[list.getSelectedIndex()]); //display the selected image
    			}
    		});
    	
    	//Adding JPanel 1 and 2 to the container
    	pane.add(p1);
    	pane.add(p2);

    	/**Set all the Components Visible.
    	 * If it is set to "false", the components in the container will not be visible.
    	 */
    	setVisible(true);
    }
    
	//Main Method
    public static void main (String[] args) {
    	displayImageUsingJList diujl = new displayImageUsingJList();
	}
}

Important Part of the Program:

//Set up event handler on JList
    	list.addListSelectionListener(
    		
    		//Handle JList event if selected index is click
    		new ListSelectionListener() {
    			public void valueChanged(ListSelectionEvent event) {
    				
    				image.setText(null); //set the label to null ready for the image to be displayed
    				image.setIcon(graphics[list.getSelectedIndex()]); //display the selected image
    			}
    		});

Adding JPanel Inside Another JPanel

Program Description:

The program below is a Java Code, a simple demonstration on how add JPanel inside another JPanel which is very useful in making a complex program layout along the way. This technique can make you add as many JPanel you want inside another JPanel.

Output:
Code:

/**
 * File: jpanelInsideJPanel.java
 * Tiltle: Adding JPanel Inside Another JPanel
 * Author: http://java-program-sample.blogspot.com/
 */

//Java Core Package
import javax.swing.*;
//Java Extension Package
import java.awt.*;

public class jpanelInsideJPanel extends JFrame {
	
	//Initializing JPanels
	private JPanel mainPanel, subPanel1, subPanel2, subPanel3, subPanel4;

	//Setting up GUI
    public jpanelInsideJPanel(){

    	//Setting up the Title of the Window
    	super("Adding JPanel Inside Another JPanel");

    	//Set Size of the Window (WIDTH, HEIGHT)
    	setSize(350,250);

    	//Exit Property of the Window
    	setDefaultCloseOperation(JFrame.EXIT_ON_CLOSE);
		
		//Constructing Main JPanel with GridLayout of 1 row and 2 column
    	mainPanel = new JPanel();
    	mainPanel.setBorder(BorderFactory.createTitledBorder("Main Panel"));
    	mainPanel.setLayout(new GridLayout(1,2));
    	
    	//Constructing JPanel 1 and 2 with GridLayout of 1 row and 1 column
    	subPanel1 = new JPanel();
    	subPanel1.setBorder(BorderFactory.createTitledBorder("Sub Panel 1"));
    	subPanel1.setLayout(new GridLayout(1,1));
    	subPanel2 = new JPanel();
    	subPanel2.setBorder(BorderFactory.createTitledBorder("Sub Panel 2"));
    	subPanel2.setLayout(new GridLayout(1,1));
    	
    	//Constructing JPanel 3 and 4
    	subPanel3 = new JPanel();
    	subPanel3.setBorder(BorderFactory.createTitledBorder("Sub Panel 3"));
    	subPanel4 = new JPanel();
    	subPanel4.setBorder(BorderFactory.createTitledBorder("Sub Panel 4"));
    	
    	//Adding JPanel 3 to JPanel 1 which means JPanel 3 is inside JPanel 1
    	subPanel1.add(subPanel3);
    	//Adding JPanel 4 to JPanel 2 which means JPanel 4 is inside JPanel 2
    	subPanel2.add(subPanel4);
    	
    	//Adding JPanel 1 and 2 to main JPanel
    	mainPanel.add(subPanel1);
    	mainPanel.add(subPanel2);

    	//Setting up the container ready for the components to be added.
    	Container pane = getContentPane();
    	setContentPane(pane);
		
		//Adding the main JPanel to the container
    	pane.add(mainPanel);

    	/**Set all the Components Visible.
    	 * If it is set to "false", the components in the container will not be visible.
    	 */
    	setVisible(true);
    }
    
	//Main Method
    public static void main (String[] args) {
    	jpanelInsideJPanel jp = new jpanelInsideJPanel();
	}
}

Important Part of the Program:

//Constructing Main JPanel with GridLayout of 1 row and 2 column
    	mainPanel = new JPanel();
    	mainPanel.setBorder(BorderFactory.createTitledBorder("Main Panel"));
    	mainPanel.setLayout(new GridLayout(1,2));
    	
    	//Constructing JPanel 1 and 2 with GridLayout of 1 row and 1 column
    	subPanel1 = new JPanel();
    	subPanel1.setBorder(BorderFactory.createTitledBorder("Sub Panel 1"));
    	subPanel1.setLayout(new GridLayout(1,1));
    	subPanel2 = new JPanel();
    	subPanel2.setBorder(BorderFactory.createTitledBorder("Sub Panel 2"));
    	subPanel2.setLayout(new GridLayout(1,1));
    	
    	//Constructing JPanel 3 and 4
    	subPanel3 = new JPanel();
    	subPanel3.setBorder(BorderFactory.createTitledBorder("Sub Panel 3"));
    	subPanel4 = new JPanel();
    	subPanel4.setBorder(BorderFactory.createTitledBorder("Sub Panel 4"));
    	
    	//Adding JPanel 3 to JPanel 1 which means JPanel 3 is inside JPanel 1
    	subPanel1.add(subPanel3);
    	//Adding JPanel 4 to JPanel 2 which means JPanel 4 is inside JPanel 2
    	subPanel2.add(subPanel4);
    	
    	//Adding JPanel 1 and 2 to main JPanel
    	mainPanel.add(subPanel1);
    	mainPanel.add(subPanel2);

Thursday, August 18, 2011

Display Image to another window using JRadioButton

Program Description:

The Java Program below is an answer to the question I read from one of the comments in PlanetCodes. The program demonstrates how to display image to another window using JRadioButton. In this problem, I have created two Java programs the "mainInterface.java" where the JRadioButtons are placed and the "displayInterface.java" which is used to display the images.

Output:

Code:

Main Interface

/**
 * File: mainInterface.java
 * Tiltle: Display Image to another window using JRadioButton
 * Author: http://java-program-sample.blogspot.com
 */

//Java Core Package
import javax.swing.*;
//Java Extension Package
import java.awt.*;
import java.awt.event.*;

public class mainInterface extends JFrame {
	
	//Intializing JPanel, JRadioButton, and the class Icon
	private JRadioButton orc, warrior, mage;
	private JPanel panel;
	private Icon orcsImage, warriorImage, mageImage;
	
	//Calling the class "displayInterface" to link the two java programs
	private displayInterface di;
	
	//Setting up GUI
    public mainInterface() {
    	
    	//Setting up the Title of the Window
    	super("Main Interface");

    	//Set Size of the Window (WIDTH, HEIGHT)
    	setSize(200,200);

    	//Exit Property of the Window
    	setDefaultCloseOperation(JFrame.EXIT_ON_CLOSE);
    	
    	//Constructing the class Icon
    	orcsImage = new ImageIcon("orcs.jpg");
    	warriorImage = new ImageIcon("warrior.jpg");
    	mageImage = new ImageIcon("mage.jpg");
		
		//Constructing JRadioButton
    	orc = new JRadioButton("Orc",false);
    	warrior = new JRadioButton("Warrior",false);
    	mage = new JRadioButton("Mage",false);
    	
    	//Register Events for JRadioButton
    	RadioButtonHandler handler = new RadioButtonHandler();
    	orc.addItemListener(handler);
    	warrior.addItemListener(handler);
    	mage.addItemListener(handler);
    	
    	//Group the Radio Buttons using the class ButtonGroup
    	ButtonGroup group = new ButtonGroup();
    	group.add(orc);
    	group.add(warrior);
    	group.add(mage);
    	
    	//Constructing JPanel
    	panel = new JPanel();
    	panel.setLayout(new GridLayout(3,1)); //Setting layout on JPanel
    	panel.setBorder(BorderFactory.createTitledBorder("Select an Image")); //Create a titled border on JPanel
    	
    	//Adding JRadioButton on JPanel
    	panel.add(orc);
    	panel.add(warrior);
    	panel.add(mage);

    	//Setting up the container ready for the components to be added.
    	Container pane = getContentPane();
    	setContentPane(pane);
		
		//Adding the JPanel in the container
    	pane.add(panel);

    	/**Set all the Components Visible.
    	 * If it is set to "false", the components in the container will not be visible.
    	 */
    	setVisible(true);
    	setResizable(false); //Set the window to a permanent size
    	setLocation(550,200); //Set the window to a specific location (X Axis, Y Axis)
    	
    }
    
	//Main Method
    public static void main (String[] args) {
    	mainInterface mi = new mainInterface();
	}
	
	//Private Inner class to handle radio button event
	public class RadioButtonHandler implements ItemListener {
		
		//handle radio button event
		public void itemStateChanged(ItemEvent event) {
			
			di = new displayInterface(); //Constructing the class "displayInterface" in order to link the two java program
			
			if(event.getSource() == orc) //Checking what radio button is clicked
				if (event.getStateChange() == ItemEvent.SELECTED) //Tracking if the radio button is selected or deselected
				di.image.setIcon(orcsImage); //if it is checked then the image will be displayed from another window
				else
				di.dispose(); //if not then dispose the window where the image is displayed.
				
				/** You have to remember that radio button has two actions, the "SELECTED" and "DESELECTED".
				 *	The reason why I put another "if condition" and the method "dispose()" is to prevent from displaying
				 *	two windows at the same time when you click any of the radio buttons. Without these functions, the radio 
				 *	button will display images everytime it is "selected" or "deselected".
				 */
			
			if(event.getSource() == warrior)
				if (event.getStateChange() == ItemEvent.SELECTED)
				di.image.setIcon(warriorImage);
				else
				di.dispose();
			
			if(event.getSource() == mage)
				if (event.getStateChange() == ItemEvent.SELECTED)
				di.image.setIcon(mageImage);
				else
				di.dispose();
		}
	}
}

Display Interface

/**
 * File: displayInterface.java
 * Tiltle: Display Image to another window using JRadioButton
 * Author: http://java-program-sample.blogspot.com
 */

//Java Core Package
import javax.swing.*;
//Java Extension Package
import java.awt.*;

public class displayInterface extends JFrame {
	
	//Initializing JLabel
	JLabel image;

	//Setting up GUI
    public displayInterface() {
    	
    	//Setting up the Title of the Window
    	super("Display Interface");

    	//Set Size of the Window (WIDTH, HEIGHT)
    	setSize(265,265);

    	//Exit Property of the Window
    	setDefaultCloseOperation(JFrame.DISPOSE_ON_CLOSE);
    	    	
    	//Constructing JLabel
    	image = new JLabel();

    	//Setting up the container ready for the components to be added.
    	Container pane = getContentPane();
    	setContentPane(pane);
		
		//Setting up the container layout
    	FlowLayout flow = new FlowLayout(FlowLayout.CENTER);
    	pane.setLayout(flow);
    	
    	//Adding JLabel in the container
    	pane.add(image);

    	/**Set all the Components Visible.
    	 * If it is set to "false", the components in the container will not be visible.
    	 */
    	setVisible(true);
    	setResizable(false); //Set the window to a permanent size
    	setLocation(285,200); //Set the window to a specific location (X Axis, Y Axis)
    }
    
	//Main Method
    public static void main (String[] args) {
    	displayInterface di = new displayInterface();
	}
}

Required Image(s):


Basic Arithmetic Operation using JRadioButton, JTextField, and JButton

Program Description:

The program below is a java code, a progject that demonstrates basic arithmetic operations using JTextField, JRadioButton, and JButton. This is a revised code from the blog PlaneCodes which I try to make the codes more understandable by putting comments and making it more organized.

The program can detect if there is no arithmetic operator selected. The program only accepts integer numbers and it will detect if the user puts double or float or string. The program can also recognize if the JTextFields are empty.

Output:
Code:

/**
 * File: basicArithmeticOperation.java
 * Tiltle: Basic Arithmetic Operation using JRadioButton, JTextField, and JButton
 * Author: http://java-program-sample.blogspot.com
 */

//Java Core Package
import javax.swing.*;
//Java Extension Package
import java.awt.*;
import java.awt.event.*;

public class basicArithmeticOperation extends JFrame {
	
	//Initializing JButton, JPanel, JRadioButton, JTextField, and the class ButtonGroup
	private JPanel panel1, panel2;
	private JRadioButton addition, multiplication, subtraction, division;
	private JTextField input1, input2;
	private JButton answer, reset;
	private ButtonGroup group;
	

	//Setting up GUI
    public basicArithmeticOperation() {
    	
    	//Setting up the Title of the Window
    	super("Basic Arithmetic Operation: +,-,*,/");

    	//Set Size of the Window (WIDTH, LENGTH)
    	setSize(475,100);

    	//Exit Property of the Window
    	setDefaultCloseOperation(JFrame.EXIT_ON_CLOSE);
    	
    	//Constructing JRadioButton
    	addition = new JRadioButton("Addition[+]",false);
    	multiplication = new JRadioButton("Multiplication[x]",false);
    	subtraction = new JRadioButton("Subtraction[-]",false);
    	division = new JRadioButton("Division[/]",false);
		
		//Constructing JPanel 1
		panel1 = new JPanel();
		panel1.setLayout(new GridLayout(1,4)); //setting layout on JPanel 1
		
		//Adding JRadioButton in JPanel
		panel1.add(addition);
		panel1.add(multiplication);
		panel1.add(subtraction);
		panel1.add(division);
		
		//Constructing the class ButtonGroup
		group = new ButtonGroup();
		
		//Group the four radio button using the class ButtonGroup
		group.add(addition);
		group.add(multiplication);
		group.add(subtraction);
		group.add(division);		
		
		//Constructing JPanel 2
		panel2 = new JPanel();
    	panel2.setLayout(new GridLayout(1,4)); //setting layout on JPanel 2
    	
    	//Constructing JTextField input1 and input2 with a size of 20
    	input1 = new JTextField(20);
    	input2 = new JTextField(20);
    	
    	//Constructing JButton
    	answer = new JButton("Show Answer");
    	reset = new JButton("Reset");
    	
    	//Adding JButton and JTextField in JPanel 2
    	panel2.add(input1);
    	panel2.add(input2);
    	panel2.add(answer);
    	panel2.add(reset);

    	//Setting up the container ready for the components to be added.
    	Container pane = getContentPane();
    	setContentPane(pane);
    	
    	GridLayout grid = new GridLayout(2,1);
    	pane.setLayout(grid);
    	
    	//Implemeting Even-Listener on JButton copy
		answer.addActionListener(
		new ActionListener() {
			
			//Handle JButton event if it is clicked
			public void actionPerformed(ActionEvent event) {
				
				//If no arithmetic operator selected, a pop-up message will appear.
				if (addition.isSelected() == false && multiplication.isSelected() == false && subtraction.isSelected() == false && division.isSelected() == false) {
						JOptionPane.showMessageDialog(null, "Please Select an Arithmetic Operator","Error",JOptionPane.ERROR_MESSAGE);
				}
				
				if(addition.isSelected()==true){	//if "addition" radio button is selected
					try {	//fetch an error using "try-catch" function.
					int a = Integer.parseInt(input1.getText()); //Convert JTextField input1 to integer by parsing and pass it to a variable "a" ready for arithmetic processing.
					int b = Integer.parseInt(input2.getText()); //Convert JTextField input2 to integer by parsing and pass it to a variable "b" ready for arithmetic processing.
					int ans = a+b; //Process the two inputs using addition.
					JOptionPane.showMessageDialog(null, "The Answer is: "+ans,"Answer:",JOptionPane.INFORMATION_MESSAGE); //Display the answer using JOptionPane
					} catch (NumberFormatException e){ //Catch the error if the user inputs a non-integer or number
						JOptionPane.showMessageDialog(null, "Please Input a Integer","Error",JOptionPane.ERROR_MESSAGE); //Display the catched error using JOptionPane
					} //end of try-catch function
				} //end of "if" condition
				
				if(multiplication.isSelected()==true){
					try {
					int a = Integer.parseInt(input1.getText());
					int b = Integer.parseInt(input2.getText());
					int ans = a*b;
					JOptionPane.showMessageDialog(null, "The Answer is: "+ans,"Answer:",JOptionPane.INFORMATION_MESSAGE);
					} catch (NumberFormatException e){
						JOptionPane.showMessageDialog(null, "Please Input a Integer","Error",JOptionPane.ERROR_MESSAGE);
					}

				}
				
				if(subtraction.isSelected()==true){
					try {
					int a = Integer.parseInt(input1.getText());
					int b = Integer.parseInt(input2.getText());
					int ans = a-b;
					JOptionPane.showMessageDialog(null, "The Answer is: "+ans,"Answer:",JOptionPane.INFORMATION_MESSAGE);
					} catch (NumberFormatException e){
						JOptionPane.showMessageDialog(null, "Please Input a Integer","Error",JOptionPane.ERROR_MESSAGE);
					}

				}
				
				if(division.isSelected()==true){
					try {
					int a = Integer.parseInt(input1.getText());
					int b = Integer.parseInt(input2.getText());
					int ans = a/b;
					JOptionPane.showMessageDialog(null, "The Answer is: "+ans,"Answer:",JOptionPane.INFORMATION_MESSAGE);
					} catch (NumberFormatException e){
						JOptionPane.showMessageDialog(null, "Please Input a Integer","Error",JOptionPane.ERROR_MESSAGE);
					}
				}
			}
		}
		);
		
		//Implemeting Even-Listener on JButton reset
		reset.addActionListener(
		new ActionListener() {
			
			//Handle JButton event if it is clicked
			public void actionPerformed(ActionEvent event) {
				
				input1.setText(null); //Empty JTextField input1 ready for the next input
				input2.setText(null); //Empty JTextField input2 ready for the next input
			}
		}
		);
		
		//Adding the two panels in the container
    	pane.add(panel1);
    	pane.add(panel2);

    	/**Set all the Components Visible.
    	 * If it is set to "false", the components in the container will not be visible.
    	 */
    	setVisible(true);
    	setResizable(false);
    }
    
	//Main Method
    public static void main (String[] args) {
    	basicArithmeticOperation bao = new basicArithmeticOperation();
	}
}

Wednesday, August 17, 2011

Copy Selected Text From JTextArea to JTextField

Program Description:

The program below is a java code that lets you copy the selected text you want from JTextArea to JTextField by just highlighting the text or string you want.

Output:
Code:

/**
 * File: copyJTextAreaSelectedText.java
 * Tiltle: Copy Selected Text From JTextArea to JTextField
 * Author: http://java-program-sample.blogspot.com
 */

//Java Core Package
import javax.swing.*;
//Java Extension Package
import java.awt.*;
import java.awt.event.*;

public class copyJTextAreaSelectedText extends JFrame {
	
	//Initializing JTextArea, JButton, and JTextField
	private JTextArea txtArea;
	private JButton copy;
	private JTextField display;

	//Setting up GUI
    public copyJTextAreaSelectedText() {
    	
    	//Setting up the Title of the Window
    	super("Copy Selected Text From JTextArea to JTextField");

    	//Set Size of the Window (WIDTH, HEIGHT)
    	setSize(380,255);

    	//Exit Property of the Window
    	setDefaultCloseOperation(JFrame.EXIT_ON_CLOSE);
    	   	
    	//Constructing JTextArea, JButton, and JTextField
    	txtArea = new JTextArea("Type the Text you want here. . . .", 10,31);
    	copy = new JButton("Copy the Selected Text >>");
    	display = new JTextField(32);
    	
    	//JTextArea Property
    	txtArea.setLineWrap(true); //Disable the Horizontal Scrollbar
    	
    	//Constructing a JScrollPane for JTextArea's Horizontal and Vertical Scroll Bar
    	JScrollPane scroller = new JScrollPane(txtArea, JScrollPane.VERTICAL_SCROLLBAR_ALWAYS, JScrollPane.HORIZONTAL_SCROLLBAR_NEVER);
    	
    	//Setting up the container ready for the components to be added.
    	Container pane = getContentPane();
    	setContentPane(pane);

    	//Setting up the container layout
    	FlowLayout flow = new FlowLayout(FlowLayout.CENTER);
    	pane.setLayout(flow);
    	
    	//Implemeting Even-Listener on JButton copy
		copy.addActionListener(
		new ActionListener() {
			
			//Handle JButton event if it is clicked
			public void actionPerformed(ActionEvent event) {
				
				//This will display the selected text from JTextArea to JTextField by highlighting the text or string you want to copy.
				display.setText(txtArea.getSelectedText());
			}
		}
		);

		//Adding the JScrollPane to the Container with JTextArea on it
		//Adding JButton and JTextField to the container
		pane.add(scroller);
		pane.add(copy);
		pane.add(display);
		
    	/**Set all the Components Visible.
    	 * If it is set to "false", the components in the container will not be visible.
    	 */
    	setVisible(true);
    }
    
	//Main Method
    public static void main (String[] args) {
    	copyJTextAreaSelectedText pjtf = new copyJTextAreaSelectedText();
	}
}

Important Part of the Program:

//Implemeting Even-Listener on JButton copy
		copy.addActionListener(
		new ActionListener() {
			
			//Handle JButton event if it is clicked
			public void actionPerformed(ActionEvent event) {
				
				//This will display the selected text from JTextArea to JTextField by highlighting the text or string you want to copy.
				display.setText(txtArea.getSelectedText());
			}
		}
		);

Wednesday, August 10, 2011

How to Program a JTextArea

Output:
Code:

/**
 * File: programJTextArea.java
 * Tiltle: How to Program a JTextArea
 * Author: http://java-program-sample.blogspot.com
 */

//Java Core Package
import javax.swing.*;
//Java Extension Package
import java.awt.*;

public class programJTextArea extends JFrame {
	
	//Initializing JTextArea
	private JTextArea txtArea;

	//Setting up GUI
    public programJTextArea() {
    	
    	//Setting up the Title of the Window
    	super("How to Program a JTextArea");

    	//Set Size of the Window (WIDTH, LENGTH)
    	setSize(290,357);

    	//Exit Property of the Window
    	setDefaultCloseOperation(JFrame.EXIT_ON_CLOSE);
    	   	
    	//Constructing JTextArea
    	txtArea = new JTextArea();
    	
    	//Constructing a JScrollPane for JTextArea's Horizontal and Vertical Scroll Bar
    	JScrollPane scroller = new JScrollPane(txtArea, JScrollPane.VERTICAL_SCROLLBAR_ALWAYS, JScrollPane.HORIZONTAL_SCROLLBAR_ALWAYS);
    	
    	//Setting up the container ready for the components to be added.
    	Container pane = getContentPane();
    	setContentPane(pane);

    	//Setting up the container layout
    	GridLayout grid = new GridLayout(1,1);
    	pane.setLayout(grid);

		//Adding the JScrollPane to the Container with JTextArea on it
		pane.add(scroller);
		
    	/**Set all the Components Visible.
    	 * If it is set to "false", the components in the container will not be visible.
    	 */
    	setVisible(true);
    }
    
	//Main Method
    public static void main (String[] args) {
    	programJTextArea pjtf = new programJTextArea();
	}
}

Important Part of the Program:

	//Constructing JTextArea
    	JTextArea txtArea = new JTextArea();
    	
    	//Constructing a JScrollPane for JTextArea's Horizontal and Vertical Scroll Bar
    	JScrollPane scroller = new JScrollPane(txtArea, JScrollPane.VERTICAL_SCROLLBAR_ALWAYS, JScrollPane.HORIZONTAL_SCROLLBAR_ALWAYS);

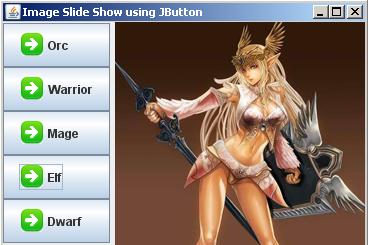
Simple Image Slide show using JButton

Program Description:

The program below is a simple java code, a slideshow using JButton to change the images. This also demonstrates two things:

1. How to set the label to image.
2. How to align the JButton icons and labels in uniform because by default the icons and the labels are aligned in the center.

Output:
Code:

//Simple Image Slide show using JButton
//by: http://java-program-sample.blogspot.com
//File: imageSlideShowJbutton.java

//Java Extension Packages
import javax.swing.*;
//Java Core Packages
import java.awt.*;
import java.awt.event.*;

public class imageSlideShowJbutton extends JFrame {

	//Initializing Components
	private JButton b1,b2,b3,b4,b5;
	private JPanel panel, panel2;
	private JLabel images;
	private Icon arrow, orcs, warrior, mage, elf, dwarf;

	//Setting up GUI
	public imageSlideShowJbutton() {
	//Title of the Frame or Window
	super("Image Slide Show using JButton");

	//Size of the Frame or Window
	setSize(370,250);

	//Exit Property of the Frame of Window
	setDefaultCloseOperation(JFrame.EXIT_ON_CLOSE);

	images = new JLabel("Waiting for Image");

	//Constructing Icon class
	arrow = new ImageIcon("arrow.gif");
	orcs = new ImageIcon("orcs.jpg");
	warrior = new ImageIcon("warrior.jpg");
	mage = new ImageIcon("mage.jpg");
	elf = new ImageIcon("elf.jpg");
	dwarf = new ImageIcon("dwarf.jpg");

	//Constructing JPanel
	panel = new JPanel();
	panel2 = new JPanel();

	//Constructing JButton
	b1 = new JButton("Orc",arrow);
	b2 = new JButton("Warrior",arrow);
	b3 = new JButton("Mage",arrow);
	b4 = new JButton("Elf",arrow);
	b5 = new JButton("Dwarf",arrow);

	//Set the Labels of the JButton in uniform alignment
	b1.setHorizontalAlignment(SwingConstants.LEFT);
	b2.setHorizontalAlignment(SwingConstants.LEFT);
	b3.setHorizontalAlignment(SwingConstants.LEFT);
	b4.setHorizontalAlignment(SwingConstants.LEFT);
	b5.setHorizontalAlignment(SwingConstants.LEFT);

	Container pane = getContentPane();

	//Setting the layout for panel
	GridLayout grid = new GridLayout(5,1);

	//Adding Button to JPanel
	panel.setLayout(grid);
	panel.add(b1);
	panel.add(b2);
	panel.add(b3);
	panel.add(b4);
	panel.add(b5);

	//Setting layout for panel2
	GridLayout grid2 = new GridLayout(1,1);

	//Adding layout and label to JPanel2
	panel2.setLayout(grid2);
	panel2.add(images);

	//Add Action on button1
	b1.addActionListener(
		new ActionListener() {
			public void actionPerformed(ActionEvent event) {
				images.setText(null);
				images.setIcon(orcs);
				}
			}
		);

	//Add Action on button2
	b2.addActionListener(
			new ActionListener() {
				public void actionPerformed(ActionEvent event) {
					images.setText(null);
					images.setIcon(warrior);
					}
				}
		);

	//Add Action on button3
	b3.addActionListener(
		new ActionListener() {
			public void actionPerformed(ActionEvent event) {
				images.setText(null);
				images.setIcon(mage);
				}
			}
		);

	//Add Action on button4
	b4.addActionListener(
		new ActionListener() {
			public void actionPerformed(ActionEvent event) {
				images.setText(null);
				images.setIcon(elf);
				}
			}
		);

	//Add Action on button5
	b5.addActionListener(
		new ActionListener() {
			public void actionPerformed(ActionEvent event) {
				images.setText(null);
				images.setIcon(dwarf);
				}
			}
		);

	//Add the panel and panel2 in the container or JFrame
	pane.add(panel, BorderLayout.WEST);
	pane.add(panel2, BorderLayout.EAST);

	setContentPane(pane);
	setVisible(true);
	}

	public static void main(String[] args) {
	imageSlideShowJbutton issjb = new imageSlideShowJbutton();
	}
}

Required Image(s):


JButton Borders

Output:
Code:

/**
 * File: jbuttonBoders.java
 * Tiltle: JButton Borders
 * Author: http://java-program-sample.blogspot.com
 */

//Java Core Package
import javax.swing.*;
//Java Extension Package
import java.awt.*;

public class jbuttonBoders extends JFrame {
	
	//Initializing JButton and JPanel
	private JButton button[];
	private JPanel panel;

	//Setting up GUI
    public jbuttonBoders() {
    	
    	//Setting up the Title of the Window
    	super("JButton Border");

    	//Set Size of the Window (WIDTH, HEIGHT)
    	setSize(220,190);

    	//Exit Property of the Window
    	setDefaultCloseOperation(JFrame.EXIT_ON_CLOSE);
    	
    	//Constructing JButton with an array of 12
    	button = new JButton[12];
    	
    	//Constructing JPanel with a FlowLayout CENTER Position
    	panel = new JPanel();
    	panel.setLayout(new FlowLayout(FlowLayout.CENTER));

    	//Constructing all 12 JButtons using "for loop"
    	for(int count=0; count<button.length; count++) {
    		button[count] = new JButton("Button "+(count+1));
    		panel.add(button[count]);
    	}
    	
    	//Setting Different Borders on each JButton
    	button[0].setBorder(BorderFactory.createLineBorder(Color.blue)); // Simple Line Border
    	button[1].setBorder(BorderFactory.createLineBorder(Color.red, 5)); // Line Border + Thickness of the Border
    	button[2].setBorder(BorderFactory.createBevelBorder(1)); // Inner Bevel Border
    	button[3].setBorder(BorderFactory.createBevelBorder(0)); // Outer Bevel Border
    	button[4].setBorder(BorderFactory.createBevelBorder(1, Color.red, Color.blue)); // Two Colors Inner Bevel
    	button[5].setBorder(BorderFactory.createBevelBorder(0, Color.green, Color.orange)); // Two Colors Outer Bevel
    	button[6].setBorder(BorderFactory.createBevelBorder(1, Color.green, Color.orange, Color.red, Color.blue)); //Four Colors Inner Bevel
    	button[7].setBorder(BorderFactory.createBevelBorder(0, Color.green, Color.orange, Color.red, Color.blue)); //Four Colors Outer Bevel
    	button[8].setBorder(BorderFactory.createEmptyBorder(5,10,5,50)); // Empty Border (Upper Space, Left Space, Bottom Space, Right Space)
    	button[9].setBorder(BorderFactory.createEtchedBorder(0)); //Raised Border Line
    	button[10].setBorder(BorderFactory.createEtchedBorder(1)); //
    	button[11].setBorder(BorderFactory.createTitledBorder("My Titled Border")); // Titled Border
    	
    	/** The Borders shown above are the basic borders that we commonly used.
    	 *  There are still lots of Border Styles available so all you have to do is to discover
    	 *  and have some experiment using all the available borders. I recommend you use JCreator Pro
    	 *  if want to know more about different border styles and learn how to implement them.
    	 */

    	//Setting up the container ready for the components to be added.
    	Container pane = getContentPane();
    	setContentPane(pane);

    	//Adding the JPanel to the container
    	pane.add(panel);

    	/**Set all the Components Visible.
    	 * If it is set to "false", the components in the container will not be visible.
    	 */
    	setVisible(true);
    }
    
	//Main Method
    public static void main (String[] args) {
    	jbuttonBoders jbb = new jbuttonBoders();
	}
}

Important Part of the Program: 

//Setting Different Borders on each JButton
    	button[0].setBorder(BorderFactory.createLineBorder(Color.blue)); // Simple Line Border
    	button[1].setBorder(BorderFactory.createLineBorder(Color.red, 5)); // Line Border + Thickness of the Border
    	button[2].setBorder(BorderFactory.createBevelBorder(1)); // Inner Bevel Border
    	button[3].setBorder(BorderFactory.createBevelBorder(0)); // Outer Bevel Border
    	button[4].setBorder(BorderFactory.createBevelBorder(1, Color.red, Color.blue)); // Two Colors Inner Bevel
    	button[5].setBorder(BorderFactory.createBevelBorder(0, Color.green, Color.orange)); // Two Colors Outer Bevel
    	button[6].setBorder(BorderFactory.createBevelBorder(1, Color.green, Color.orange, Color.red, Color.blue)); //Four Colors Inner Bevel
    	button[7].setBorder(BorderFactory.createBevelBorder(0, Color.green, Color.orange, Color.red, Color.blue)); //Four Colors Outer Bevel
    	button[8].setBorder(BorderFactory.createEmptyBorder(5,10,5,50)); // Empty Border (Upper Space, Left Space, Bottom Space, Right Space)
    	button[9].setBorder(BorderFactory.createEtchedBorder(0)); //Raised Border Line
    	button[10].setBorder(BorderFactory.createEtchedBorder(1)); //
    	button[11].setBorder(BorderFactory.createTitledBorder("My Titled Border")); // Titled Border

 
Design by Free WordPress Themes | Bloggerized by Lasantha - Premium Blogger Themes | Hostgator Discount Code